How to turn a photo into a Perler bead pattern
Updated July 2026 · about 12 min
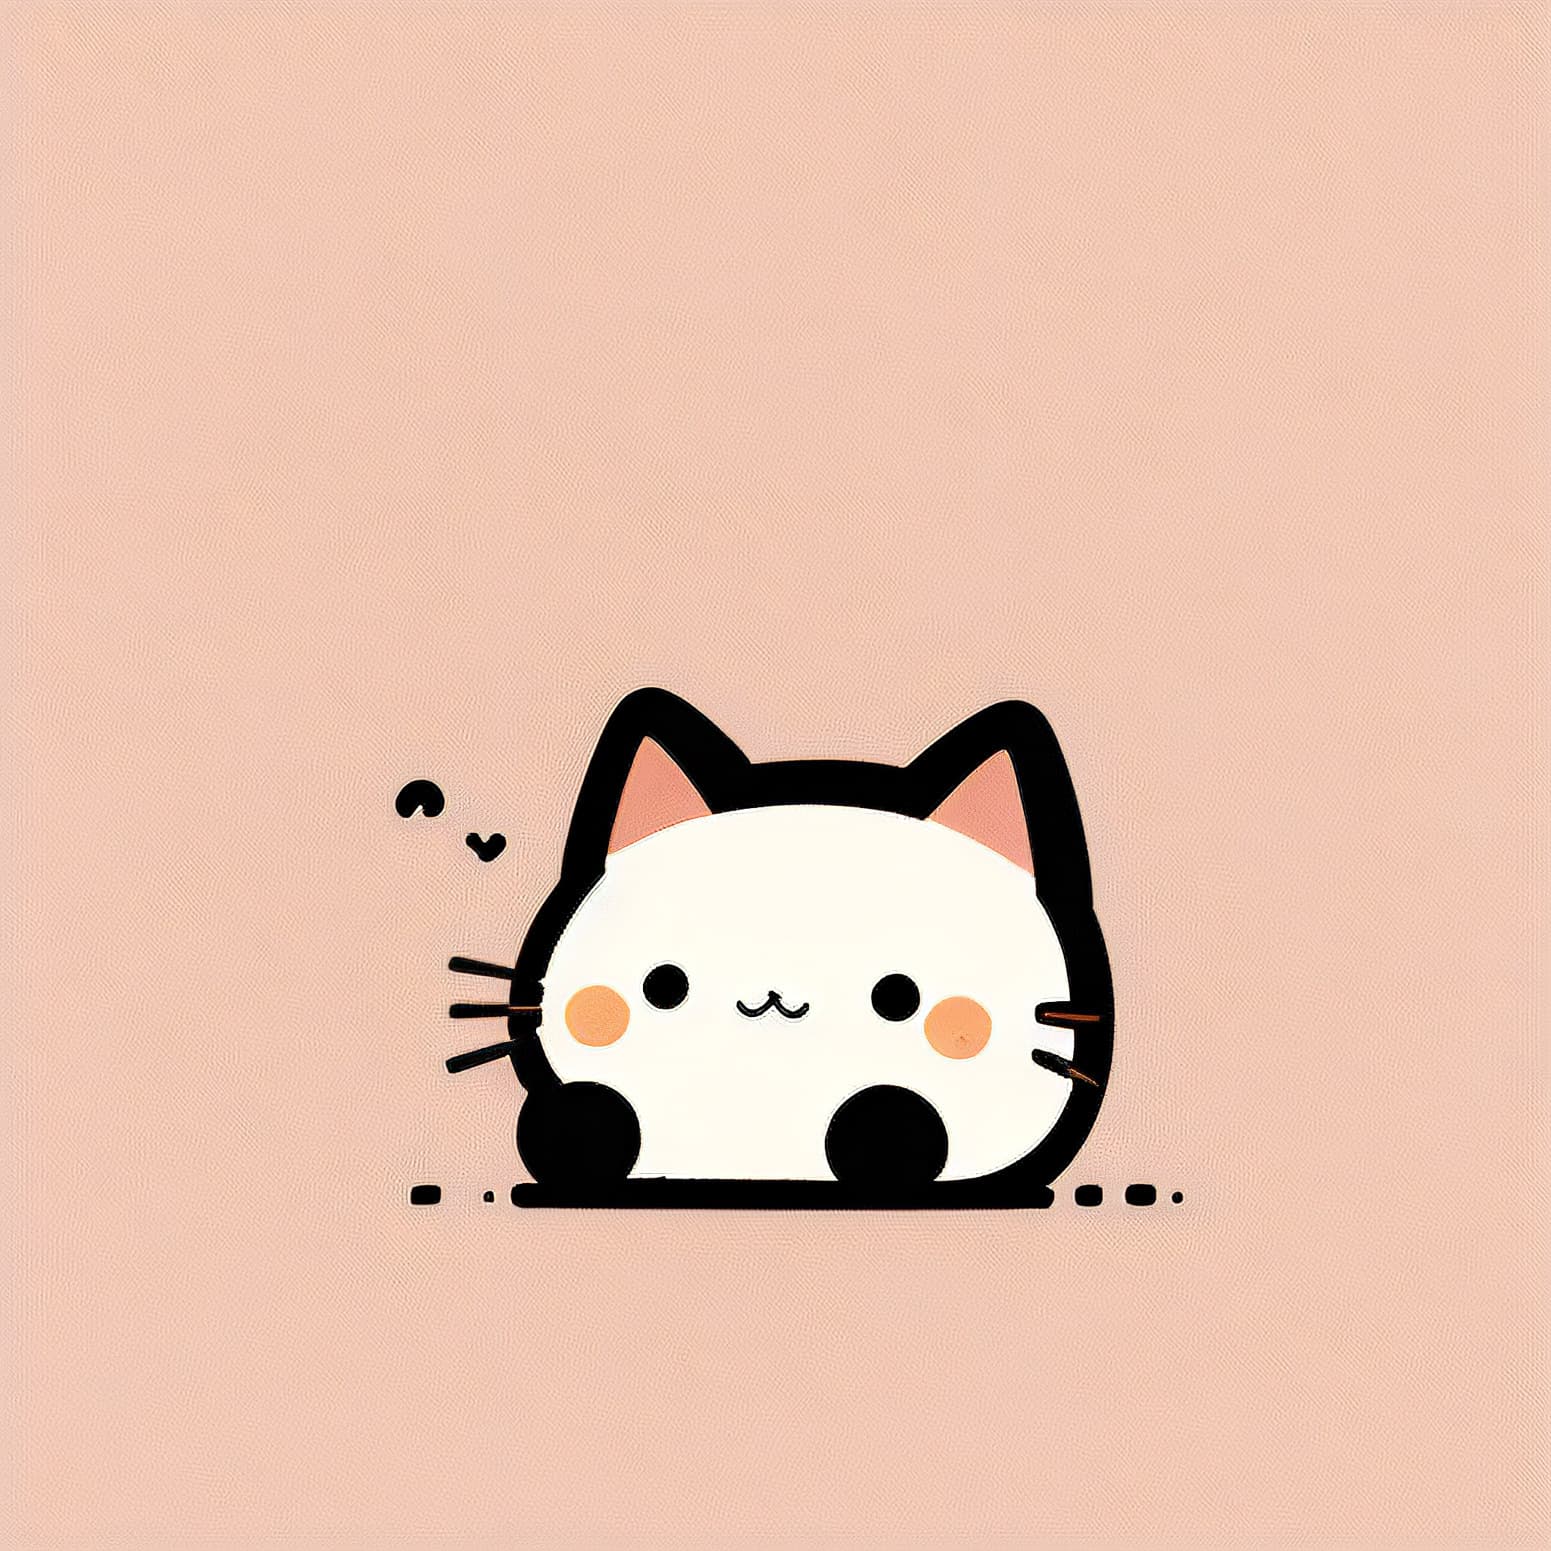
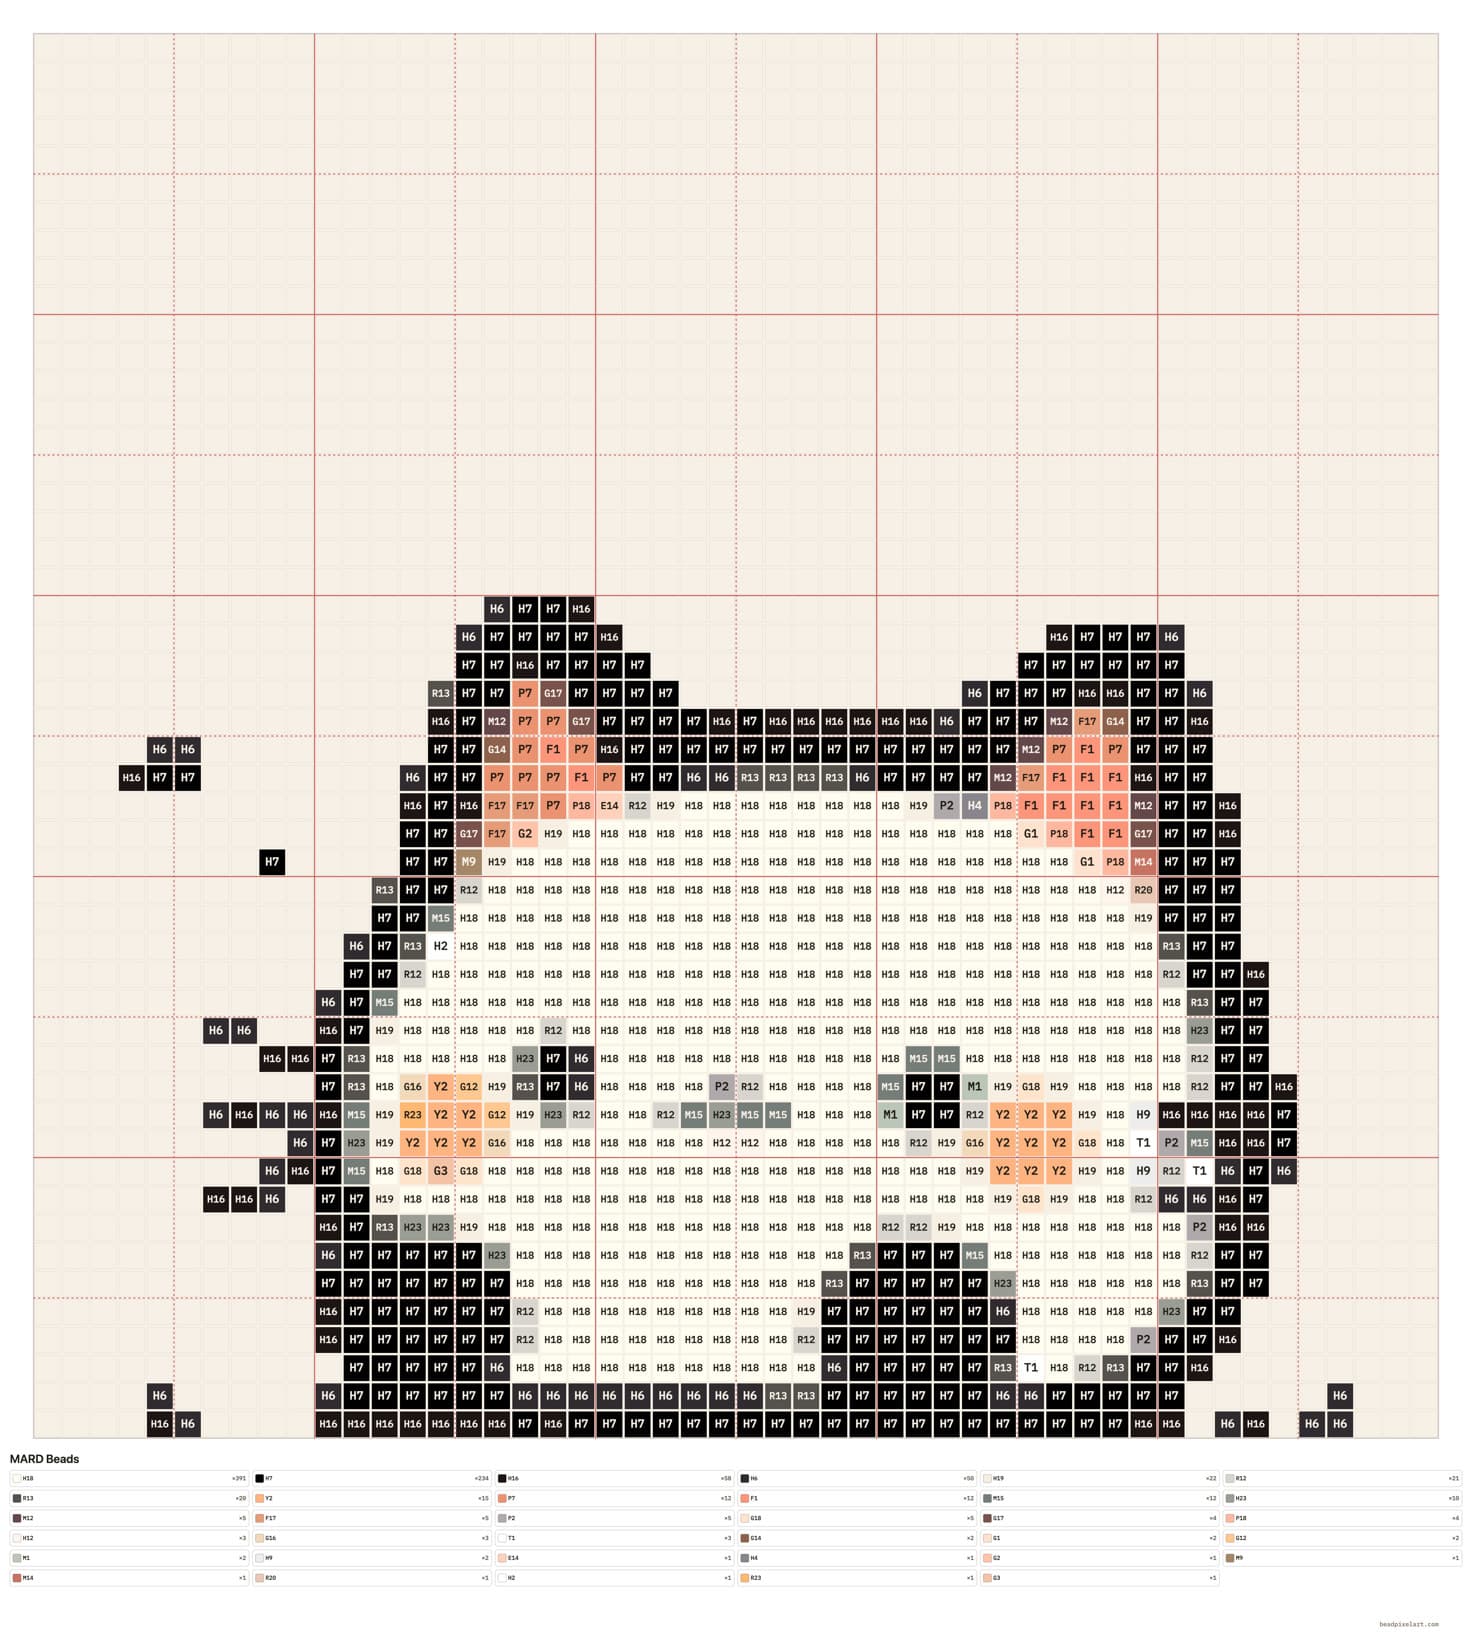
Upload a photo, set board size and brand, crop and clear the background, tidy the grid, then export a chart and shopping list. Below is a real run with a kawaii cat: source photo, then the MARD chart after cleanup.
1. Start with a clear subject
High contrast and a clear subject help. Busy backgrounds eat beads. If the subject is tiny in the frame, use edge crop so the grid spends beads on what you care about. Solid or flat pastel backgrounds (like the cat below) are easy to remove with one color pick. JPG, PNG, WebP, and GIF work, max 10 MB.
Example: kawaii cat photo to MARD chart
We ran this on the live tool. Source: a round white cartoon cat in the middle of a pink field, lots of empty margin. That kind of picture works well for fuse beads. The cat still reads from a distance, and you can wipe the pink so you do not buy beads for empty space.
- 1
Upload and choose size + brand
Drop the photo in the editor. Long edge around 50 to 58 usually keeps ears and whiskers readable without a crazy bead count. Use 29 if you want one quick board. We used MARD here; switch to Perler, Hama, or Artkal if that matches the codes on your trays.
- 2
Crop the wasted margin
The cat is centered, but the pink still takes cells. Use Trim edges / crop until the face and body almost fill the board. Leave a little room so ears are not cut off. This often helps more than jumping to a huge size.
- 3
Pick background color to clear empty beads
Click Pick background color, then click a pink cell (or any cell that should be empty). Raise or lower Background tolerance until the field is empty and only the cat is left. Keep whiskers, cheeks, and ear tips. Background dust beads should go. If the tool starts eating the cat, lower tolerance and pick a cleaner pink cell.
- 4
Export PNG + shopping list
Export a high-res PNG (codes on cells optional) and download or copy the material list. Empty cells do not count. Check codes against beads under real light before you buy a lot. On-screen RGB is only a plan, not a color warranty.
Same idea on pets, logos, or sprites: crop, clear the background, export. If the subject is already centered and the background is flat, those two tools do most of the work. A few paint strokes on eyes or outlines usually finish it.
2. Choose board size (long edge)
Presets set the long edge in beads: 29 is about one board, 50 for more detail, 58 about two boards, 87 about three. The short edge follows the photo aspect ratio. Use the custom slider for sizes in between. For character art like the cat, 50 to 58 is a decent balance of detail and work.
3. Pick a brand palette and max colors
Choose MARD, Perler, Hama, Artkal S/M, Nabbi, or IKEA Pyssla. Full MARD is hundreds of codes. Cap max colors near what you actually own (108 is a sane default). After you clear the background, cartoon faces often need fewer unique colors.
4. Cartoon vs Detail style
Cartoon keeps big flat regions. Good for stickers and kawaii art. Detail averages each cell and reduces colors with median-cut, so photo gradients look smoother with less dither grain. Try both on the same photo and keep the one that is easier to bead.
5. Refine on the grid
Pan and zoom. Paint and fill to fix faces or logos, erase empty pegs, undo bad strokes. Guides every 5 cells and row/column numbers help when you build. Square cells if you want a harder pixel look. After background removal, a few strokes on eyes or outlines usually do it.
6. Export for building
Export PNG with full codes when you need them (B8, A16, and so on). The file can include a material list under the board. You can also download or copy the list text and sort by code and count.
7. Privacy reminder
Mapping and export run in the browser. There is no image upload API, so the cat (or family photos) never leave the device for conversion. The Privacy page covers what stays local and what ordinary page hosting may log.
8. Reality check before you buy beads
Screen RGB will not match plastic under a desk lamp. Check codes against your trays. Buy a little extra of common colors (white and light grey show up a lot on the cat chart). The chart is a build plan, not a color match promise.
Try it
Open the editor, drop a photo, crop, clear the background, export. Or load the demo and change size and brand until the grid looks right.